- Getting started
- Installing Theme and Plugins
- Demo Content Installation
- Theme Options
- Sidebars / Widgets
- Setting the slider
- Setting the pages
- Setting the Blog
- Setting the Portfolio
- Setting the Team Members
- Setting the Testimonials
- Setting the Client's Logo
- One-page site
- Visual Composer
- Setting WPML Multi-Lanuage
- Translation
- Shortcodes
- FAQ
- Sources / Credits
FAQ
Freqently Asked Questions
This page contains solutions for general questions
Questions List
Q1: The SELECT element (dropdown) in "Contact Form 7" form is looking very good on Remould demo site but not on my site.
A1: We wrapped the SELECT element (dropdown) with a DIV that change the look of the SELECT element. Here is the sample code:
<div class="selectstyle">
  <select name="myselect">
    <option value="option1">Option 1</option>
    <option value="option2">Option 2</option>
    <option value="option3">Option 3</option>
  </select>
</div>
Q2: How to update Remould theme?
A2: We are providing regular bug fixes, enhancements and also features to our all buyers. So we are releasing new version frequently. The theme update process is handled by the Envato Market Plugin plugin. Click here to know how to setup Envato Market Plugin. You can download the plugin by clicking here.
If you haven't installed the Envato Market Plugin on your site Click here to know how to install this plugin on your site.
Please disable / delete the Envato WordPress Toolkit plugin on your site as development of this plugin is ended, and they officially recommend to use the new Envato Market plugin. Read the official declaration on this link.
Q3: How to disable comments from PAGES (and also other post types) ?
A3: There are two steps to disable comments.
- First, disable comments from existing pages
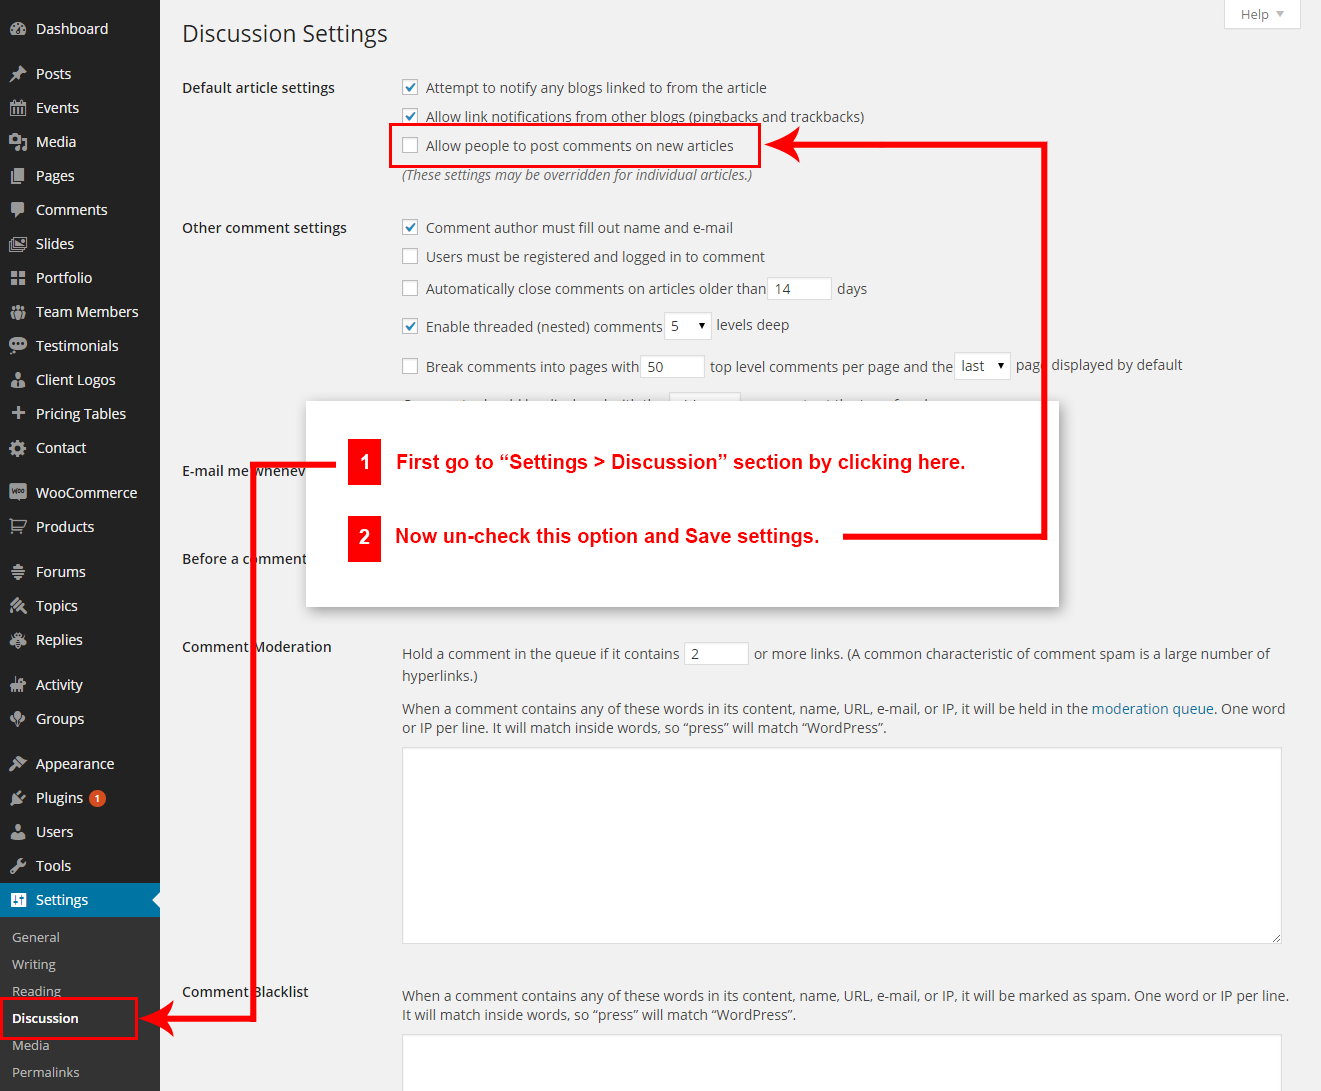
- Second, disable comments from new pages so comments would be disabled on new pages too.
Here are steps to disable comments from existing pages:
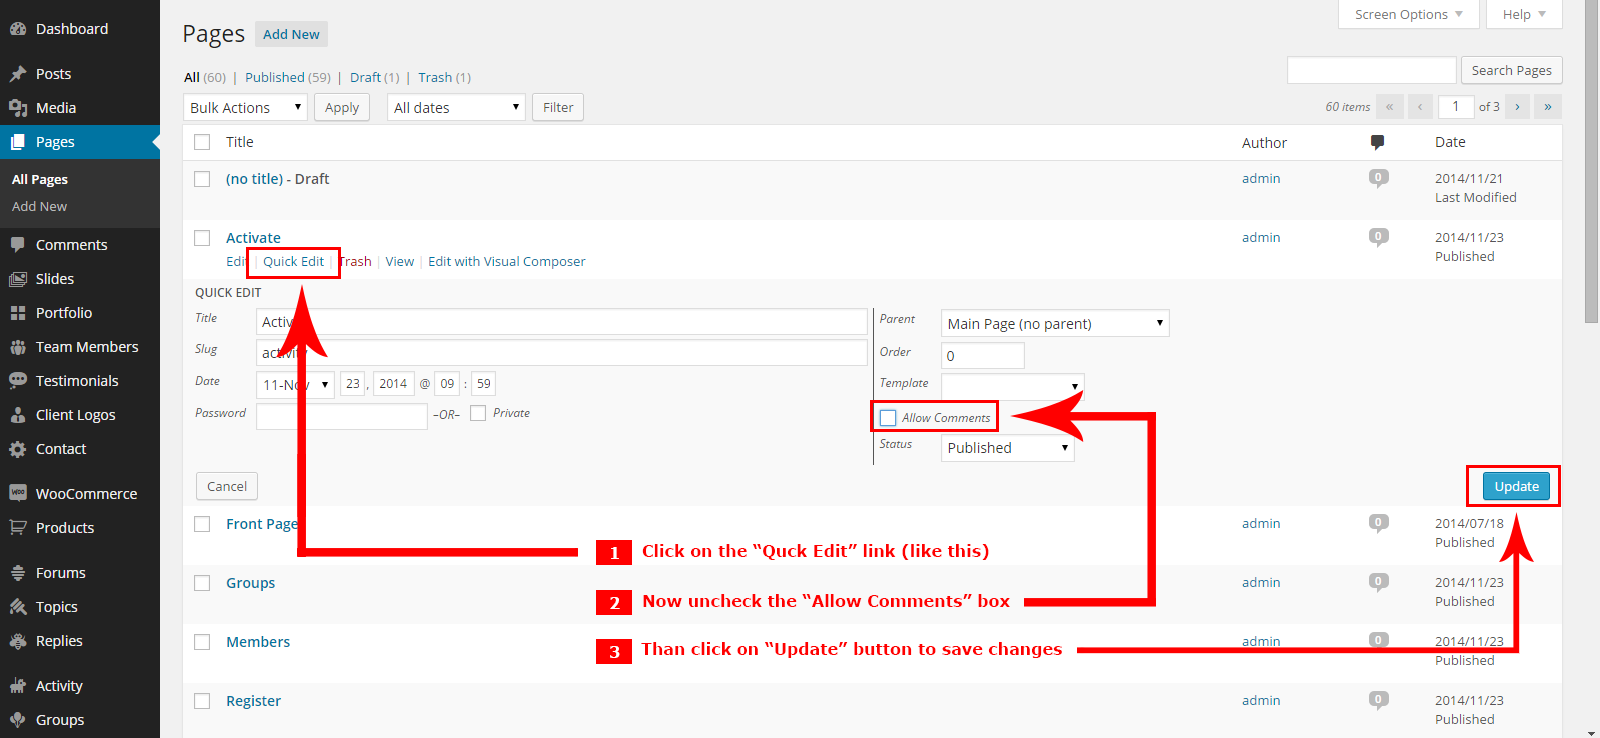
Here are steps to disable comments from new pages (so comments would be disabled on new pages too) :
Q4: Message shows "The following plugin needs to be updated... : WPBakery Visual Composer" after updating the theme?

A4: The old version of Visual Composer is not compatible with WordPress v4.1 So we updated the plugin. So this message shows that you should update the Visual Composer plugin.
You can follow steps given below:
- First go to
Admin > Pluginssection. - Deactivate the WPBakery Visual Composer plugin:

- Now, delete the WPBakery Visual Composer plugin:

- It will ask you for conformation, just click on the "Yes, Delete these files" button to remove the plugin:
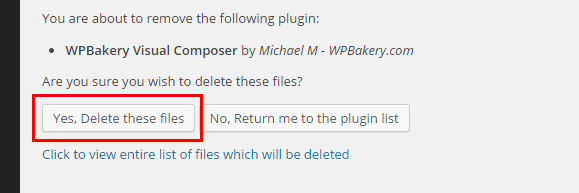
- Now the top message shows message to install the WPBakery Visual Composer plugin. Click on the Begin installing plugin link:

NOTE:- If this message shown above doesn't appear on your screen. Just go to Admin > Appearance > Install Plugins section and follow the steps below. - Now click install link

- Now you will see conformation message like this:
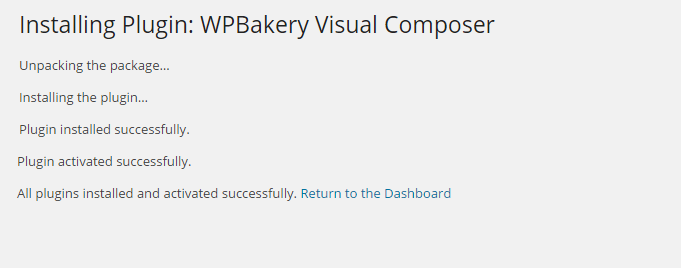
- Done
Q5: How to find Remould theme Purchase Code?
A5: The purchase code is a code that verifies that you are a genuine buyer. Here are steps to find your purchase code:- To find your licence key/purchase code you need to log into your ThemeForest account and go to your “Downloads” page:

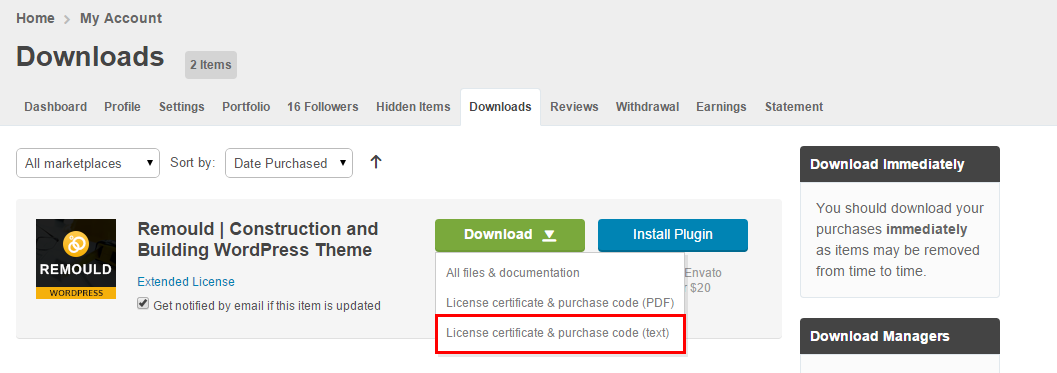
- Now click on the Download button (next to the Remould item) and click on the Licence certificate & purchase code link:
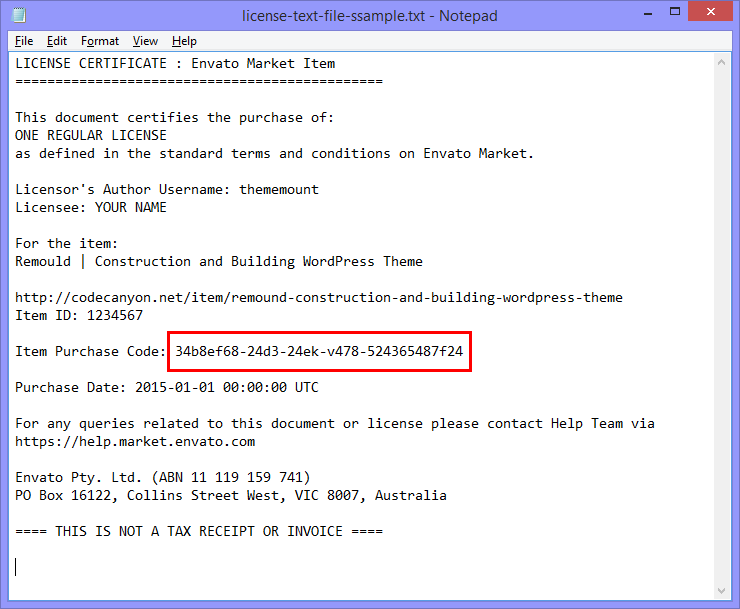
- You will get a text file to download. Just download it and open in text editor and you will find your purchase code:
- Done
Q6: Message shows "This theme requires the following plugin: Envato Market Plugin."

A6: The Envato Market Plugin plugin is developed by Envato (Theme Forest). This plugin will automatically update themes you purchased (example "Remould" theme) easily. Follow the steps given below:
- Manually installing the plugin (if you don't get message to install the plugin in admin section):
You can install the Envato Market Plugin manually. Just click here to download plugin and install it via regular plugin installation process. There is also another way to install the plugin. After activation, just configure the plugin to make it work.
- Auto installing the plugin (if you get message to install the plugin in admin section):
- Click on the Begin installing plugin link:

- After that, click on the Install link again:

- Than the pluign will be installed and you will see message like this:
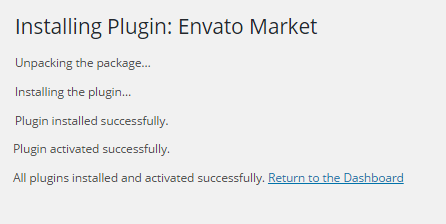
- So now the pluign is installed.
Envato Market Plugin Setup.
- From the dashboard’s Envato Market page, click “generate a personal token”.

- When you are taken to the Envato API page, enter a name of your choice into the Token name field.

- Agree to the terms, then click “Create Token” button.

- Once you’ve copied the token, check the confirmation checkbox and then click “Woohoo! Got it.” button.
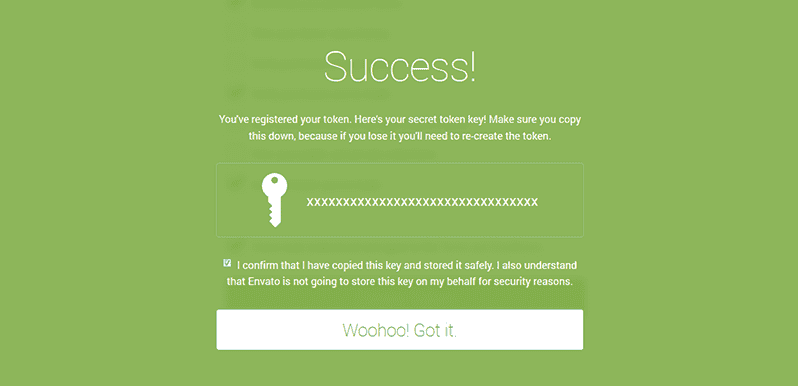
- Return to the Envato Market page of the dashboard and enter your copied token, then click “Save Changes” button.
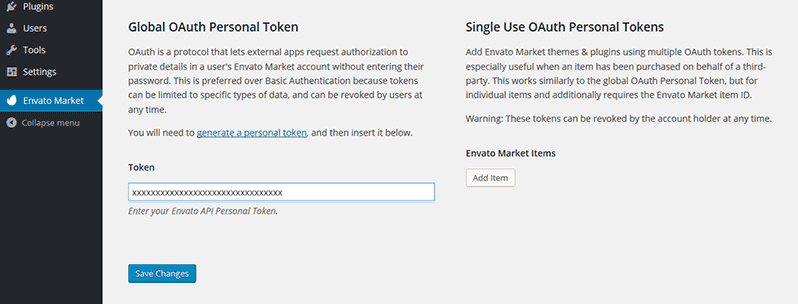
- When the overview of themes purchased on ThemeForest is displayed the Envato Market plugin setup process is complete.

Q7: How to set responsive menu breakpoint (from which window size the menu will become responsive) ?
A7: You can set it from
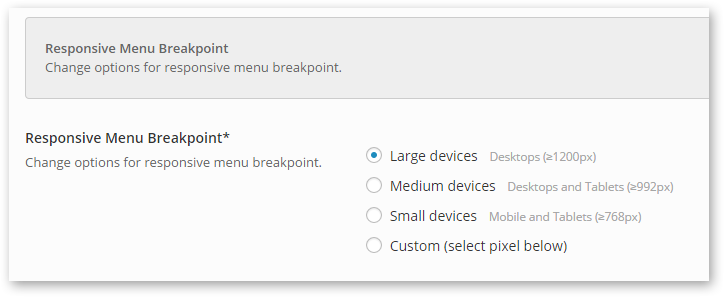
Admin > Appearance > Theme Options > Menu Settings section. Just go to this section and select window size (or set pixel) under "Responsive Menu Breakpoint" option.Note: If you don't find the option than you are using old version of the theme. Please update the theme to the latest version to get this option.
The option will look like this:
Q8: How to add my own custom font to the theme ?
A8:
NOTE: You should know HTML and CSS languages for this.
You can use your own custom font with our theme too. You should have TTF file for this. Here is the overall steps:
- First we need to convert your TTF file to other font formats like EOT, SVG, TTF and WOFF.
- Than we need to upload on your site via FTP and load it in our theme.
- Than apply the custom font on your site.
-
Convert TTF file to EOT, SVG, TTF and WOFF formats:
There are so many online (free) services than can convert your font files. Here are some websites:
https://onlinefontconverter.com/
https://transfonter.org/
https://www.fontsquirrel.com/tools/webfont-generator
Just convert your fonts from any of the above site and download converted files on your pc.Example:
If you try to convert "Open Sans" font and if you have open-sans.ttf file than you can convert and get these files after converting it:
- open-sans.eot
- open-sans.svg
- open-sans.ttf
- open-sans.woff
-
Upload on your site:
Now you need to upload the downloaded font files on your server. Just create a new folder on your server at root and upload the files in it.
For example:
- www.yoursite.com/my-custom-font/open-sans.eot
- www.yoursite.com/my-custom-font/open-sans.svg
- www.yoursite.com/my-custom-font/open-sans.ttf
- www.yoursite.com/my-custom-font/open-sans.woff
-
Add CSS code to use it:
Now the files are uploaded on our site. So first we need to add
@font-faceCSS to add the font to use in CSS code. You can write custom code in our theme at Admin > Appearance > Theme Options > Custom Code > CSS Code box. So add code like this:@font-face { font-family: 'Open Sans'; src: url('/my-custom-font/open-sans.eot'); /* IE9 Compat Modes */ src: url('/my-custom-font/open-sans.eot?#iefix') format('embedded-opentype'), /* IE6-IE8 */ url('/my-custom-font/open-sans.woff') format('woff'), /* Modern Browsers */ url('/my-custom-font/open-sans.ttf') format('truetype'), /* Safari, Android, iOS */ url('/my-custom-font/open-sans.svg#svgFontName') format('svg'); /* Legacy iOS */ }Now the font is available to use. So we are going to apply the font on H1 tag (for testing only). Here is the sample code:
h1{
    font-family: "Open Sans", Verdana, Tahoma !important;
}
You can add class to apply the font on it. That's it.
Q9: How to set Contact Forms alike Demo site ?
A9: You can easily set Contact Form alike form shown on our demo site. We are using "Contact Form 7" plugin for forms so you should install it first if not installed. Here are list of forms used on our demo site with code.
- Sample code for Form used on Contact 1 Page of demo site.
<div class="col-sm-4 col-md-4 col-lg-4"><p>[text* your-name  placeholder "Your Name"]</p></div>
<div class="col-sm-4 col-md-4 col-lg-4"><p>[email* your-email placeholder "Your Email"]</p></div>
<div class="col-sm-4 col-md-4 col-lg-4"><p>[text* your-website  placeholder "Your Website"]</p></div>
<div class="col-xs-12 col-sm-12 col-md-12 col-lg-12"><p>[textarea your-message placeholder "Your Message"]</p></div>
<div class="col-xs-12 col-sm-12 col-md-12 col-lg-12"><center><p>[submit "Send"]</p></center></div>
- Sample code for Form used on Contact 2 Page of demo site.
<p>Your Name (required)<br />
    [text* your-name] </p>

<p>Your Email (required)<br />
    [email* your-email] </p>

<p>Subject<br />
    [text your-subject] </p>

<p>Your Message<br />
    [textarea your-message] </p>

<p>[submit "Send"]</p>
